Tuesday 11 December 2012

"The Chicken, or The Egg?"

This post is all about a series of birds I have been drawing.

It all began when I went to visit my boyfriend in his new flat, fifty minutes walk away. I found a copy of Scott McCloud's "Understanding Comics" on the work desk. Then I read it.

I proceeded to become obsessed with the idea of creating comics to illustrate things. In fact, I'm surprised I'm not trying to illustrate this post. I think it's because this story is not very funny.

After reading through the following links, I started to play a fancy game of scribble game.

(Hint: replace the 2 in the second URL with 3, or 4, or 5, and so on, to get to the next post in the series)
http://www.tcj.com/layout-workbook/
http://www.tcj.com/layout-workbook-2/

You know the one. Someone draws a scribble, and the other one has to make a picture out of it.

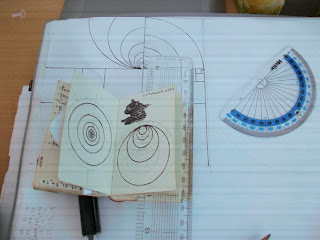
After reading the posts about squaring the page (I'm currently at "Layout Workbook 8"), I started squaring the page; drawing squares and diagonals and circles, and then drawing a picture out of those initial lines.

The result has somehow ended up being a series of bird-like things.

The first one was spontaneous. I saw something that looked a bit like a beak, and so a beak it became.

The second one was just because I wanted to draw another bird.

The third one was because it was staring at me from the future. Once I saw it, I had to draw the frowning owl.

The fourth one was a request that went wrong and so was adapted into a different kind of bird than requested.

The fifth rectified the mistake made in the fourth.

The sixth is currently still in my head. It was suggested by someone after they were shown the turkey in the fourth. It's going to be a peacock.

Follow this blog if you ever want to see the peacock alive. in reality, or improve your chances of seeing the tweet announcing the existence of the bird on my brain by following @CharGyse on Twitter. By the way, the answer is the egg.

Monday 10 December 2012

AlphaOmegaSin

The following is a post that had been left in Draft mode for a month. I had meant to come back to it and make it more post worthy, but then I completely forgot about it when my life got busier (more posts to follow). Something about reading it just now has made me decide to post it almost as it was when I left it, the only change being this little note. If you get bored of him, feel free to stop watching him. 

~
Lol:

 Less lol:


Turns out I find it less funny when I actually agree with the point he's trying to make (that sales aren't the Key Performance Indicator, or KPI, of whether a game is good from a player's perspective.) I was quite disappointed during the video, until that end bit where he changes from ranting nerd to absofuckingmentalutely nerd. Suddenly, I found something to laugh at again.

Check out the previous post here to find out why I found his first video funny (Hint: I'm laughing at him, not with him); or follow this blog to find out why it took so long for me to post the follow up.

Friday 9 November 2012

Sound's like it won't be a Dead Cat nor $50,000...

My mysterious housemate Ollie (a.k.a. author of The Enormous Blogodile) made a surprise appearance in the house today. While here, he informed me about Peter Molyneux's massively multiplayer smartphone game / giant psychological experiment, "Curiosity".

After I took a look at the following video, my response was similar to my response towards Zynga games:

- Almost entirely sure I would never play it,
- Entirely certain that I would not pay for extra content in it,
- Quite interested to see the big picture ideas or lessons that come out of the whole thing.


I also posted a link to it on my Facebook Art & Design Page with the following status/comment text:
I don't think I can like this until someone else finishes it and I learn that the ending was really clever without having to put any time or money into clicking or chisels myself. I kind of have my own pixels to manipulate. Or maybe I just have more patience than curiosity in this case.

It just sounds to me like popping bubble wrap except something is supposed to happen when the last bubble is popped and we're supposed to want to know what.
But then! Oh, but then....

But then I found and watched the entire video below.


I found his reaction towards Peter Molyneux's decision to put a $50,000 price tag on the Diamond Chisel absolutely hilarious.

Perhaps I'm just an ignorant douchebag who finds great joy in the angry incredulity (yeah, I didn't realise that was a word until just now either) and frustration of others despite any valid points they might or might not be making.
Trollollollollol.

Perhaps I just find it funny when people get angry about the rules of a game that don't guarantee them a win.

Lol. 
It's a game, not life.
 Either cry to your parent/guardian about how unfair it is 
or design a new game with the rules you think it should have. 

In any case, thanks to the enjoyment I received, I have now mentally elevated the Curiosity experiment from crappy-Zynga-games-level to something better and more valuable to me, like some-pranky-mindfuck-stunt-Derren-Brown-might-pull. I think I'm actually jealous that Molyneux did it before I got to think of it. I do love messing with people sometimes.

I've never seen any of this guy's videos before, but after I watched it I exclaimed out loud, "That guy is fucking mental" and decided to see how I'd find his other videos. I'm going to watch them after I've published this post.

I look forward to more angry nerd videos. Oh! Imagine Curiosity being reviewed on Zero Punctuation.

In the meantime, I need to do some research on Kit Williams and the golden hare. Sounds exactly like a plan inspired by Mark Z. Danielewski's "House of Leaves" and Danny Wallace's "Join Me" that I wanted to carry out a year ago but never really finished.


Follow this blog to see if I ever post a follow up post on the angry guy from AlphaOmegaSin or end up getting lost on a mysterious trail of my own invention.

To create, one must first destroy.

Look! I'm using the proper caption tool! Also, check out this swanky fictional apartment. Are you jealous?
Today, a man visited us here in our rented house in Cardiff, doing checks for roof insulation. A chatty fella. When he saw that the girl sat on the couch in her pink fluffy dressing robe appeared to be navigating a virtual world, he asked her what she was playing.

When I told him that it wasn't a proper game, he cheerfully replied, "Ah, I see! I thought it didn't look very exciting!"

I imagine his response might have been different if he had heard me add that it was just a thing I made and that there wasn't anything to do yet, but he had already propelled himself onto the response above and evidently didn't pick up on my quiet mumblings. Perhaps he's used to something a little more rapid-fire. I didn't even get to sound brainy by telling him that I hadn't got around to programming anything more than some basic start screen menus.

I would show you what it is he saw to gain a second opinion, but unfortunately the shameful evidence of the boring appearance of my game's lower floors at that time is gone. Earlier this afternoon I deleted a bunch of what were to be redundant materials in the Materials folder in Unity, which turned lots of the objects in the game bright pink.

It looked exciting - too exciting. I know my dressing gown is pink, and my pyjama top is pink, and even my laptop is pink, but if I could pick a favourite colour it may surprise you to know that it would not be pink. If you checked out my not-so-secret secret hoard of collected online images, you'd see. Even if it was my favourite colour, it really wasn't the look I wanted for the objects in this part of the game. It was supposed to look like a Wetherspoon pub.

The Damage.
Somehow I figured out that turning off the option to import the materials turns these bright pink objects grey, and my eyes rejoiced. All of this does mean that I now have to reapply all the colours to the objects. Perhaps it's a good thing. I mean, none of them had been properly unwrapped or textured anyway. Should probably get on that.


Follow this blog for more updates on this project, which could be on the road to nowhere but hopefully isn't.

Monday 24 September 2012

The Seeker - puzzle/adventure game by FatPancake!

I've been helping out with some environment art development in the fantasy puzzle/adventure game The Seeker recently. Here's a quick run through of what I've gotten up to:

During play-testing I walked through mountains, fell off the world multiple times (a few times on purpose), and got stuck 127hours-style. Sounds somewhat exciting, doesn't it?

On the slightly more productive side of things, I did some UV unwrapping for Pete's mountains.

Then I built a big wooden cable car, complete with large wooden frames/docks for the rope to be attached to at the top and bottom of the cable car's journey. Here it is:


That is all from me for now, you can expect to see more updates here on development of The Seeker later this week.

Sunday 5 August 2012

Learning Blender, getting on Polycount, and my game art portfolio.

I've registered with Polycount and will be posting things on my own Sketchbook thread there: 
http://www.polycount.com/forum/showthread.php?t=103296

I've also created a visible portfolio site on tumblr for Environment Art for games I create:

Here's the first image I've posted up on both of the above:


It's certainly not finished, but it will do for a placeholder for the finished version. Constructive critiques are very welcome, just post your suggestions in the comment box below.

Friday 3 August 2012

Learning Blender - with Essential Blender (Day... I'm not sure anymore) Chapter 11: Lighting

Yesterday I started to look through Chapter 9 on Materials, but decided to jump ahead to Chapter 11 on Lighting and go through that first. Here are the screenshots from yesterday:


I definitely have to intergrate this into my brain system! The lighting shown here is a mixture of using Ambient Occlusion and an Area Light, I think set up exactly as it told me to in the book.. which is excellent, as it means when I inevitably forget how to do it, it will be right there for me to look up again.

I have also set up a new tumblr blog called "Charlotte Gyseman's Game Art Scrapbook", although there is a password on it to keep the scrap from the public domain so this note is really only for my own benefit than for anyone else reading this..

In case you are interested, here's a quick list of my publicly accessible tumblr blogs. Some I really like. Some are a bit neglected. All of them have the same basic layout.

A Growing Mountain [May Contain Hot Stuff]. http://chargyse.tumblr.com/
A scrappy collection consisting only of photos or screenshots I have taken of things in my life (although some of the photos I took were of photos taken of me).

A Growing Mountain of Stuff I Love http://chargyse-loves-this.tumblr.com/
A collection consisting almost entirely of reblogs of things I've found by others. Things can make it on to this blog for their cuteness, their colours and composition (which may or may not actually be any good but are always pleasing to me), or for any other reason that makes me feel like, "Yeah, I want to add this to my collection."

Charlotte Gyseman's Art Cards (ACEO & ATC) http://chargyse-aceo.tumblr.com/
An archive of all the art cards I produce. They are a really nice way to make sure I finish a piece, because each one is so small and is it's own original piece of art. They're also a nice way of trying out little experiments without feeling like it will lead to nowhere (although experiments should never really lead to nowhere).

A Growing Mountain of Jewellery http://chargyse-jewellery.tumblr.com/
A somewhat neglected at the time of writing blog of the 3D printed jewellery I designed in Spring 2012. This one will probably be renovated after I've learned how to produce somewhat photorealistic representations of the materials available from Shapeways.

Saturday 28 July 2012

Learning Blender (Day 7) - Adding details and creating the other side of the street.

Here's how the place was looking at the end of Day 7:


I've added blocks to the front walls, arches to the front doors, windowsill ledges and gave the chimneys a little more character by adding those round things you find on the top... I've also added another  mirror modifier as you can see, to duplicate the other side of the street.

That was only really to see what it looks like with two sides of a street done. In reality, the other side of the street is slightly different to my side of the street. As practice for speeding up my modelling, I've tried modelling the opposite side of the street completely from scratch to see how far I could get in forty minutes. It wasn't quite far enough for my satisfaction, so I kept going. Here's how it looked after about two hours, with occasional distractions.

As you can see, the main difference is in the layout of the front window on the bottom floor.

I managed to make the basic shape, added the windows and door shapes, added the arches above the applicable window and door (according to a look out my window, the top windows in the houses opposite don't actually have arches. I'm not sure why...), added the windowsills, gave the chimney some character, added drainpipes and guttering, and added the front walls with some character and a plane for the dividing fence between the properties. I think this would probably be enough for a low poly game, at least for buildings that players never go into or see behind.

For more realism I suppose I would add the round things on the tops of the chimneys, and the TV aerials, but perhaps those are best done separately later anyway as they aren't all the same with some having extras and others missing some. The arches also have keystones that stick out slightly, which you don't find on the buildings on my side of the street.

Other than that I think the only thing I would do is tidy up some of the vertices to give it fewer polygons, for example, that line going straight down the side of the house would be removed, as would the faces for the houses not on the ends of the row and the floor faces I used as guidelines underneath it.

I'm thinking that today (Day 8) I'll read through Chapters 9 (Materials and Textures in Blender) and 10 (UV Unwrapping and Painting), have a bit of a play as I do, and then later tonight try another forty minute modelling-from-scratch challenge and see how it goes.

Thursday 26 July 2012

Learning Blender (Day 6) - Modelling a Cardiff street.

Beginning yesterday evening, through to this afternoon, I've been working on a low-poly street; this time in Cardiff. Here's how it's looking today:

This is actually the street I live on...

So far I have done the basics of the fronts of the houses and the base, given the windows their characteristic arches on the upper edge and some windowframes, and added simple drainpipes and chimneys. I'm using Google maps for reference and utilising the Modifiers so that I only have to work on one house, and it updates the rest of the houses in the street.

From what I learned of the tutorial from my previous post, it should not be taking me a day to do one house, but something more like 40 minutes. I think I'm taking my time for a couple of reasons, one being because it is my own street. The other reason is I'm being distracted by the game of Assassins Creed my housemate is playing. Hopefully with experience I will be able to knock out the basic form for a whole street a lot faster.

However, the plus side of choosing these streets in Cardiff to model is that they all look quite similar in this area (a couple of times last year I had absent mindedly turned right too soon when walking back to my own house, only noticing my error halfway down the road), so it will be quite easy to make up a number of streets from this first house quickly, making only minor adjustments to define each street.

Monday 23 July 2012

Learning Blender (Day 4) - Modelling a Low Poly Building for Games

www.pxleyes.com/video-tutorial/maya/15684/How-to-Model-a-Low-Poly-Building-for-Games.html

I found the video tutorial above that showed me someone creating a New York style building asset in about 40mins using Maya. Be warned; I had to turn the volume up on my laptop to hear it, and then he spent a lot of time talking quietly to himself - although that was mostly him thinking aloud about what shapes to make things and stuff like that... But other than that, it was worth watching to me.

I tried following along in Blender, and succeeded! Here's a screenshot of the wireframe and a render I lit with some coloured lighting. 

Definitely need to figure out how renders work...

The lighting was partly for fun... I'm likely to spend some time at some point learning how to light things properly and better, but I thought this would do for now since I'm focusing on learning the modelling tools first.

Sunday 22 July 2012

Learning Blender - with Essential Blender (Day 3)

Here's what I've been working on today, for the model of my bedroom I'm going to make for practice and portfolio.

Tah dah!

I've modelled one of the doors in my bedroom. Still needs its handle though, and a hook, but I may do those separately since there are a few hooks in my bedroom.

I'm also hoping I get faster - this simple door took me almost all day.

What visual games photorealism crisis?


http://killscreendaily.com/articles/visual-games-photorealism-crisis/

Just came across this post from over a year ago. I don't know if the focus of discussion in the gaming world has moved on by now since I haven't been paying attention a whole lot, but I have to say that I really don't agree with the thought that the photorealistic approach is "... a dead-end street, an aspiration that, once perfectly achieved, leads to a death of possibility."

Instead, I see it as a route to more tools that allow us to create realistic-looking representations of fantasy and imaginary worlds. Just look at the Avatar film. Focusing on the world environment itself, so much of it looked like nature documentaries I had seen literally that morning that I could easily imagine that this was a whole functioning other world, similar to ours, but very different. I know I'm talking about a film here, but I think with games it can also apply.

But not even just fictional fantasy worlds; photorealism can be used to represent all sorts of historical places and events realistically and factually too for us to explore - a bit like in the Assassins Creed games. And the number of possible events or locations during specific times/eras to re-present in a gaming experience grows literally every day.

Gaining tools to create photorealistic stuff is NOT what would lead to the death of possibility. Believing that the only goal is attaining photorealism, and ignoring the fact that it's not the only thing worth pursuing, is the mistake that may lead to the death of possibility - and even then, ONLY in the minds of the people who believe it. While they cry over the fact that they just created the last game worth creating visually, the rest of us will be enjoying the tools that have been created for our own entertainment, educational, or exploratory purposes.

When considering the Big Picture, photorealism should never be seen as the ultimate goal; it's just a useful tool worth attaining to help us accomplish other goals. No one should forget that.

Saturday 21 July 2012

Learning Blender - with Essential Blender (Day 2)

Here is where I've reached this afternoon:


Unfortunately, I seem to have forgotten many of the keyboard shortcuts I've learned, so I will have to make this pillar all over again to try to program those shortcuts into my brain and body!

21st July 2012, 8.45pm -
There we go! Finished that section of the chapter. Here is the bridge it told me to make, with the render flowing into the wire-frame image.


Friday 20 July 2012

We're making mead!

Home brewed mead, mmm mmm! A few days ago when Sam Irving was around, we put together some honey and water into must (he got some cool trickling images recorded on camera somewhere) and added some yeast nutrients and yeast to that honey-water must mix. Now it's bubbling away in the demijohn with a slight fizz in the main part and a gentle rhythm in the airlock.

White Tiger guards it.

Don't worry, we sanitised everything first! Some sanitised drops of liquid even accidentally dropped into the demijohn from the funnel because it was put on before I had rinsed it. Some people get too excited...

17th July 2012, 7.53pm -
The bubbles going fast! like four a second!

18th July 2012, 11.28am -
This morning it is fizzing just loudly enough to make me think the boiler was doing something until i got up and found out the boiler wasn't doing anything. Also there's a slightly sweet smell in the air down there! 

Hope it tastes good when it's done!

Learning Blender - with Essential Blender

I'm finally getting around to going through the Essential Blender pdf book that I bought. Today, I have manipulated vertices, edges and faces, moving them around and extruding them in Blender for the first time.

I'm so happy. I'm so excited.

I'm so close to getting back to the level of knowledge I had in a 3D modelling program, one that I had access to until I graduated last year, when suddenly I lost access to that legit student version of Maya I have installed on my laptop.

Not content with the idea of pirating a copy just to make masterpieces of 3D game art for a portfolio or for my own devilish purposes, I backed away from 3D art completely until coming across the Autodesk 123D beta a few months ago. When I found out how to put a shiny texture onto on object imported into Blender, I saw the joy again.


That's the romanticised version. In truth, I wanted to try starting up a business selling something artistic I had created - but I suck at business. It's all very well knowing it by a book but, with entrepreneurship, you've got to be good at doing it.

So, it is time to get a job, preferably in the game biz making 3D objects for a game that I can later hear other people talking about playing, or maybe even with a company that needs renders of buildings that aren't built yet. But before I get a job, I need to give them something to show them that I can model, unwrap UVs, texture realistically and fantastically, and maybe a spot of rigging and animating.

Follow this blog to check my progress! :)

3D printing jewellery with Shapeways: Halting my exploration.

Four months after first getting into 3D printing at Shapeways, I've come to the decision to stop.

It's all very interesting, and I love that I can order something that is a real life version of a piece of jewellery I created out of imagination digital bits. The only problem however, is that to get the item made real, you DO have to shell out a bit of money. And for a girl with currently no income but the interest on her savings, it's not an economically viable hobby to immerse myself in.

I mean, yes, there is a potential to make money from these things. But without the luck and the drive to get those items both seen and make them desirable enough for people to actually buy, instead of simply drooling over screenshots or photographs, it's not something I'm likely to earn enough money to live off.


Unless it's something they already want, I'm not very good at making people buy things from me via the internet. I'm finally going to admit to myself that marketing and business is not really my passion and it's not my forte - at least, not in the real world. Give me an in-game auction house filled with rich people who can't be bothered to slay little dragonwing things for eggs and I'll be loving it, but only until I realise I won't be able to pay the bills to play the game anymore.

Getting back to the subject at hand: I can keep the shop there on Shapeways open, as it currently does not cost anything to list something and it's all automatic so there is no need for the shop keeper to turn up everyday. Perhaps I will continue to upload new bits and pieces occasionally, and if anyone commissions me to design them a piece of jewellery or other object like that using Shapeways, or any 3D printing service, I'd happily put into practice what I've learned over the past few months.

But now... now is the time to acquire a proper job. One where I get to do something creative, but I get told what that creative thing is and when they need it done by and that they are paying me to do it. I'm currently thinking 3D Environment Artist for games. Some people find it boring, but those people want to be making the moving characters for the games, not the worlds in which those characters live.

Games biz. You are on my to do list.

Thursday 7 June 2012

3D printing jewellery with Shapeways: Three months in.

Well, I haven't done a lot of .stl file production over this past month. My recent interests seem to have moved away from the realm of sci-fi and technology and towards the realm of handcrafted, homemade materials and items. I blame my recent exposure to the second series of Game of Thrones, although I went to the cinema to watch Prometheus last night, so maybe the effects of that on me will emerge in the next few weeks. That said, I will probably be spending this month panicking about finding a new place to live.

Here's what I have been upto:

- did some calculations on the Shapeways ceramic material to find out potential prices for differently sized things. Ceramic is odd; they price it by surface area, not volume.

- did some calculations on the Shapeways sterling silver material and British hallmarking laws - and then removed the ability to buy in silver from everything that would be over 7.78g in weight from my shop before I get me into trouble...

- did some research on the Shapeways stainless steel material to figure out potential sizes and prices for awareness jewellery.


- did some research for suppliers of hemp cord and wooden beads. I bought some last year and wanted to make sure I could replace my supplies before I committed them to a piece.

- did some research on cord or yarns produced entirely in Britain. I emailed some people who sell items made from their alpacas' fur to ask if they also supply the yarn itself, but they have yet to reply... so I'm looking at others.

- experimented with the hemp and wooden beads I already had. The picture here shows 16 bracelets, made from combinations of two different ways of knotting, four different colours of 1mm hemp cord, and four different types of 8mm wooden bead.


- posted a question on Facebook and the Shapeways forums to ask which style of photo filter people preferred out of these four...


- started thinking about different things to adorn the hemp bracelets/anklets with... I'm now wearing four bracelets on my wrists with the following decoration:
1. a pretty pocket watch I bought from a car-boot sale in Saundersfoot. It wasn't working, so I've set the time to the time I was born - ten to noon.
2. a silvery ringpull/keyring combo.
3. the Eight Petals Crossed square pendant in sterling silver.
4. and a Desperados bottle top with a greenish two pence piece from 1979.

It's a strange combination to wear all at once. I like it.

Tuesday 8 May 2012

Just five things.

My boyfriend has set me the challenge of selling five things before he gets back from England. Just five things. Any five things. If I can sell five things by the 15th of May, I'll be such a happy bunny for managing it!


The sterling silver pendants vary in price but are all currently less than £50 each.
The translucent plastic pendants also vary in price but are all less than £10 each.


If you want to help me, you can do any of three simple things:

  1. Show the shop to everyone and their mums if you think they'd like the look of these. 
  2. Buy something you like from here: www.shapeways.com/shops/chargyse
  3. Get someone else to buy you one ...or five.

Even if you only get one thing, that's 20% of my happibunnyness meter filled up - all thanks to you!


Here are five things, just five things, that I can share with you for free:

  • Thing #1: Pair up to take advantage of the prices. If you and a friend want the same or matching pendant designs, go for the earring pendants instead of the singular pendant. It works out as cheaper, and WAY cheaper in the case of silver. It's like two for one!


  • Thing #2: Gather your friends to lower shipping costs. There is only one shipping cost per order as it all comes in one box, so if you and a few friends get together and place everything you want in one order, you can split the shipping cost between you.


  • Thing #3: Consider which pendants will work together to make a really cool combo. I'm currently wearing one silver pendant and one translucent plastic pendant that hang on top of each other on one chain. With the nine designs being currently available in two materials, there are 324 possible pairs.
    Add a third pendant to the mix and the number jumps up to 5832 different combos!
    Add to that the endless varieties of chain or cord you use to hang you pendant on, and you'll end up with a pretty unique piece of neck-wear.

    No need to stop at necklaces either - combine with macrame to make a cute bracelet, or go somewhere completely different with it. You ever heard of Paco Rabanne


  • Thing #4: Paint your plastic, polish your silver. The people who 3d print the pieces before they are sent to you have a forum where people can share post-production techniques. Some of these techniques include painting and polishing. Have a look for inspiration and tips for what to use and how to do it: Post Production Techniques @ Shapeways.com


  • Thing #5: Feel free to sell your combinations on. I know there are a lot of handmade jewellery makers out there, and I'd be so excited to find out my pendants were helping them make their beautiful works. You want to sell or give away some jewellery you made using one of my pendants in the design? Go for it. I'd be delighted to hear that you did.


Monday 7 May 2012

3D printing jewellery with Shapeways: Two months in.

It's been two months since I started playing around with Autodesk 123D and Shapeways, so here's the second report of what I've managed over the past month.

CharGyse 3D Printed Designs - Find these and more at www.shapeways.com/shops/chargyse

My first shipment of items arrived from Shapeways about a week later than it would normally take (production of sterling silver pieces was behind schedule on their end). I've been waiting to post this update so that I could include the photos of them.

Photos of the earrings and pendants
These are the photos I took only minutes after unpacking them from the box. I have updated the shop images with close ups, so you can follow this link to the [SHOP] if you want to see the close ups of them all.

Earring pendants in Sterling Silver

Earring pendants in "Frosted Ultra Detail"

You can find these earring pendants in the Earrings section of the shop.

Necklace pendants in Sterling Silver

Necklace pendants in "Frosted Ultra Detail"

You can find these necklace pendants in the Pendants section of the shop.

Bangles to go with each set
I got the bangles done on time, doing two different designs; the second more dainty than the first.

The "SevenBangle" style - one bangle, but with seven pretty sides to it

The "DiAngled" bangle - shaped like two bands attached to each other at an angle

You can find these in the Bangles section of the shop.

Blender renders for a quick preview of the pieces
I did a little searching around and found a video tutorial on how to make a golden material in Blender. They've disabled embedding by request, but the link is here: Realistic Gold Material Tutorial Blender 2.62 (Cycles) 

I followed the video but changed the colour I used so that it would look less like gold and more like a silver material. Here are some quick screenshots I took of some stuff:


Oh yeah - I also modelled a little something up for the Shapeways "Flextest" challenge

After the first shipment arrived though, I realised that I would need to change the Blender material textures. I remember seeing a "Brushed Steel" texture tutorial somewhere, which could be handy in achieving the layered look of the silver pieces - if I can find it again.


COMING SOON:-

Beads
I have managed to get the beads modelled up - but I've yet to upload them to the Shapeways site.


Rings
I haven't managed to do the rings yet, but I have decided how I'm going to do them. The ring band will be based on the DiAngled bangle style (the dainty, minimalist, second style above).

A new collection of designs - in "Stainless Steel"
Looks like the series based on Fibonacci numbers is going to go on hold for a while. Instead, I will be working on "Stainless Steel" versions of everything I have done so far, which should work out cheaper than Sterling Silver. Good for those who want a metal pendant, but at lower prices.

Marketing and Selling Stuff
Now that these are things that exist, I have to get them noticed out in the wider world with marketing materials and stuff.

Monday 2 April 2012

3D printing jewellery with Shapeways: One month in.

I've been playing around with the Autodesk 123D Beta and Shapeways for just over a month now, so I wanted to write a little report of what I've managed over the past month.

Tumblr


I've created a tumblr blog especially for images of the growing mountain of jewellery that will be generated over time by me. Follow it and eventually you will see photographs of the pieces up there as well as the computer generated renders of the designs before they have been printed.

Pendants


I've designed, modelled in CAD software and uploaded nine designs for pendants, and each has been listed publicly and are available for sale in both sterling silver and a translucent plastic known on the Shapeways site as "Frosted Ultra Detail".

Click Pendants to see them all.

Earrings


I've modelled matching pairs of earrings for each of the nine pendant designs, again in sterling silver and Frosted Ultra Detail.

Click Earrings to see them all.

Cuff-links


I've also designed and modelled the matching pairs of cuff-links for each of the nine pendant designs, available only in sterling silver, and a glossier sterling silver for a little extra [the cuff-links are polished/buffed before they are sent to you].

Click Cuff-links to see them all.


COMING SOON:-

Photos of the earrings and pendants

Yesterday I put through an order for all of the earrings and pendants designed so far. They should be shipped by April 18th at the latest so I should have them ready for photos by the end of next month. I've been looking at potential models and photographers for a shoot, but nothing has been decided just yet...

Bangles to go with each set

My "homework" for the next week is to get ready the matching set of bangles for sale - that's designed, modelled AND uploaded. Thankfully, my experience with the software I'm using has grown a lot over the past month and I'm now able to complete such tasks a lot more quickly and efficiently than I could in the beginning.

Charm Beads

I've been looking into creating the designs on a much smaller scale for charm beads, potentially in the threaded charm bead style or the Italian charm bead style... We'll see how it goes over the next month.

Rings

To complete the collection of each design, I will be working on ring versions for each design this month. I have no idea how I want to do it yet, but I intend to make them fit in with the rest of the collection in sterling silver and possibly Frosted Ultra Detail. We shall see.

A new collection of designs

We've been having lovely weather in Cardiff over the past week, and all that nice weather made me ditch my laptop for the little 2 by 3 inch notebook I made a while back. I had to make sure I was doing some kind of work while I enjoyed the nice weather during my self-enforced work hours, and ended up drawing up some nice designs based on circles and Fibonacci numbers. Keep an eye out for those in the next couple of months. Here's a sneaky peek:


I'm really looking forward to next month!

Tuesday 13 March 2012

My First Nine Designs for 3D Printed Jewellery

17 days after checking out Shapeways, I've got a collection of 9 designs uploaded:


Each charm is available in Silver, Glossy Silver or a plastic material they have called "Frosted Ultra Detail".

They are available for sale separately, so you can buy one on its own to hang and wear as a necklace, or buy multiples to hang from your own earring hooks or string together to wear as a bracelet.

Fancy yourself a bit of a fashion or jewellery designer? Buy a variety of them and incorporate them into your designs, mixing and matching with other beads and materials however you like. All of these are 3cm by 3cm and quite thin, with four corner holes, each hole 4mm in diameter for cord, thread or wire to be threaded through.

I'm really happy to see items bought from my shop be combined with other materials and used as part of your own jewellery or fashion designs to be sold at markets, online or offline, just be sure to leave me a photo or a message linking to it so I can see what you've done with them!

You may wish to modify the charms with paint or other treatments to add your own personal touch, or leave them in their natural state. Shapeways has a forum section dedicated to Post Production Techniques that you can check out for tips and ideas. Go wild, it's up to you! :)

Click here to check them out in the Shop!

Wednesday 29 February 2012

Using free Autodesk 123D Beta to design Shapeways models for 3D printing

I'm excited. Really excited.

The other day I was introduced to the Autodesk 123D Beta. The software is Computer Aided Design [CAD] software that allows you to design 3D models. It's also free to use at the moment... Here's a work in progress I'm working on today:


After a little bit of browsing, I found out about Shapeways. Shapeways is a website that allows you to upload .STL and some other file types containing models you've designed, and get them to print out your design in 3D in various materials, including Plastics, Metals, Ceramics, Sandstone and Glass. The price you pay depends on what price the material is per cubic centimetre, and how much material your model uses up.


Shapeways also allows you to open up a shop of your designs and place a percentage markup on the design. Whenever someone purchases a 3D print out of your design, Shapeways holds this percentage for you and sends it to you at the end of the month.

This means I and all my friends who have 3D modelling skills [CGD, I'm looking at you!], can be uploading model designs for objects for other people around the world to buy on demand.

Essentially, it's a Passive Income Stream. You put the effort in to make one model, upload it, and do some publicity, and there you go. If people want the model, they'll be buying it while you sleep.

Like I said; really excited.


To keep up to date with my new designs and artwork via Facebook, check out my FB Page at CharGyse Art & Design and give it a Like!

Saturday 11 February 2012

Searching for sand paper.


That moment when you've been researching how to cut glass bottles,

and have consumed plenty of Harveys Bristol Cream sherry,
so that you have a nice blue bottle for cutting,

and realise that the rough and fine sand paper you have kept

- in your collection of potentially useful things that never actually see the light of day
(except when you add another potentially useful thing) -

may actually have a use now,

and are searching for it in every place you can remember it being
- while tipsy,

since you've decided you're going to do a trial cut on a spare Desperados bottle

that you just happen to have kicking about although you finished it a long time ago,
- but you are still probably too tipsy to be attempting such things,

when really it would probably be easier to just buy one off the Internet.


But where's the fun in that?

Thursday 9 February 2012

IndieDB Genre & Theme Popularity February 2012: Part 3

On the 1st of this month (February) I spent some time collecting data from the IndieDB website, and created a few graphs from the data. This is Part 3 of 3 in the series.

Do let me know in the comments box below if you find the results helpful, for example, when trying to choose a genre or theme for your next game. If there are specific combinations of Genre and Theme you would like to find out about in more detail, leave me a comment and I will check it out for another post.

Popularity Based on Average Number of Views per Games Listed.

[Average number of views per game: 12,880]

As you can see from the graph, averaging out the number of views over number of games listed has really changed up the results.

Popularity of Genres on IndieDB [based on average number of views per game]:

1. RPG [16,316]
2. Simulation [15,325]
3. Adventure [14,421]
4. Strategy [13,907]
5. Action [13,362]

--[Average]--

6. Driving [8,988]
7. MMO [8,189]
8. Puzzle [4,835]
9. Sport [2,103]

Popularity of Themes on IndieDB [based on average number of views per game]:

1. Fighter [27,435]
2. Medieval [27,228]
3. Western [19,937]
4. War [19,196]
5. Anime [18,216]
6. Fantasy [16,155]
7. Realism [15,501]
8. Sci-Fi [13,174]

--[Average]--

9. Horror [11,808]
10. Movie [9,736]
11. Antiquity [8,494]
12. Comedy [7,277]
13. History [7,214]
14. Politics [6,603]
15. Nature [6,376]
16. Various [5,494]
17. Comic [4,850]
18. Sport [3,451]

Top 5 Most Popular Combos:

1. Medieval RPG [72,293]
2. Horror Driving [65,269]
3. Fighter Adventure [52,459]
4. Realism Strategy [42,714]
5. Anime Action [37,146]


IndieDB Genre & Theme Popularity February 2012: Part 2

On the 1st of this month (February) I spent some time collecting data from the IndieDB website, and created a few graphs from the data. This is Part 2 of 3 in the series.

Do let me know in the comments box below if you find the results helpful, for example, when trying to choose a genre or theme for your next game. If there are specific combinations of Genre and Theme you would like to find out about in more detail, leave me a comment and I will check it out for another post.

Popularity Based on the Total Number of Views.

[Note: Zero views is a result of zero games being listed rather than a lack of interest from those searching.]

Popularity of Genres on IndieDB [based on number of views]:

1. Action [16,569,687]
2. Adventure [11,580,708]
3. Strategy [5,076,047]
4. RPG [4,699,093]
5. Simulation [2,237,476]
6. Puzzle [1,373,202]
7. MMO [835,288]
8. Driving [638,196]
9. Sport [100,947]

Popularity of Themes on IndieDB [based on number of views]:

1. Sci-Fi [12,199,964]
2. Fantasy [8,950,136]
3. War [4,300,076]
4. Horror [3,140,973]
5. Fighter [2,551,495]
6. Medieval [2,314,380]
7. Realism [2,170,226]
8. Various [1,620,951]
9. Anime [1,439,084]
10. Comic [1,328,901]
11. Comedy [1,288,123]
12. Western [498,430]
13. Nature [427,250]
14. History [281,352]
15. Politics [204,701]
16. Antiquity [161,394]
17. Sport [155,315]
18. Movie [77,893]

Most popular combo: Fantasy themed, Adventure genre.
[Closely followed by: Sci-Fi themed, Action genre.]


IndieDB Genre & Theme Popularity February 2012: Part 1

On the 1st of this month (February) I spent some time collecting data from the IndieDB website, and created a few graphs from the data. This is Part 1 of 3 in the series.

Do let me know in the comments box below if you find the results helpful, for example, when trying to choose a genre or theme for your next game. If there are specific combinations of Genre and Theme you would like to find out about in more detail, leave me a comment and I will check it out for another post.

Popularity Based on Total Number of Games Listed.


Popularity of Genres on IndieDB [based on number of games listed]:

1. Action [1240]
2. Adventure [803]
3. Strategy [365]
4. RPG [288]
5. Puzzle [284]
6. Simulation [146]
7. MMO [102]
8. Driving [71]
9. Sport [48]

Popularity of Themes on IndieDB [based on number of games listed]:

1. Sci-Fi [926]
2. Fantasy [554]
3. Various [295]
4. Comic [274]
5. Horror [266]
6. War [224]
7. Comedy [177]
8. Realism [140]
9. Fighter [93]
10. Medieval [85]
11. Anime [79]
12. Nature [67]
13. Sport [45]
14. History [39]
15. Politics [31]
16. Western [25]
17. Antiquity [19]
18. Movie [8]

Most popular combo: Sci-Fi themed, Action genre.

Thursday 2 February 2012

Making a Race Car Game in Unity3D

I've started work on a racing game to get myself to learn Blender, GIMP, and brush up on Unity3D. Here's the proposal document I wrote to myself:

Fancy looking document to help Developer Me persuade Publisher Me...

So far I've been following the Unity Car Tutorial for an "arcade-style race car set-up" and have gotten through section 1. I took it for a test drive and it definitely needs some tweaking, which is where the second section comes into it.

I'm not sure how I'm going to be able to make my own car after going through only this, so I'll have to have a look around to figure out what all different parts of the Car Game Object are meant to be.

EDIT: I found an even better tutorial for making a really basic car from scratch.